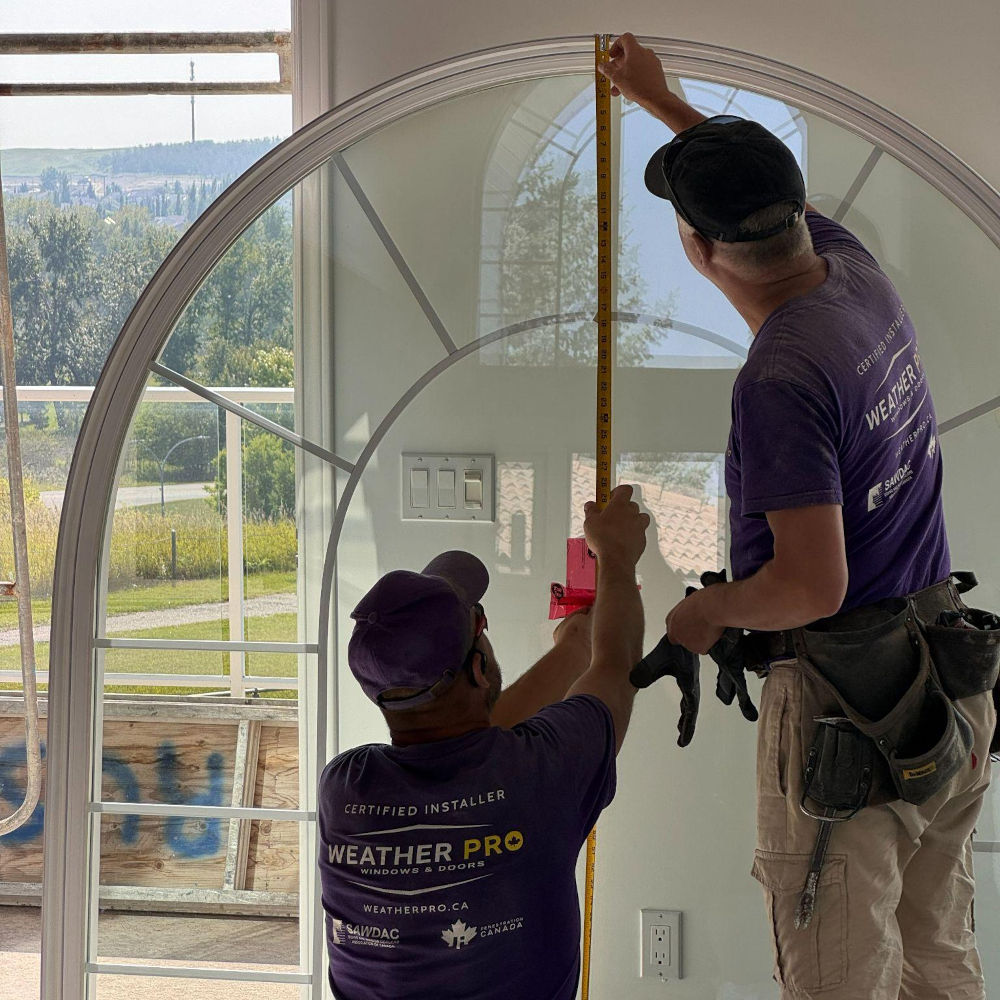

Getting window measurements right the first time saves you from costly re-orders, installation delays, and gaps that let cold Canadian air straight into your home. Whether you’re planning a full replacement project or gathering numbers before calling a specialist, accurate measurements are the foundation of every successful window installation. The process is more systematic than most homeowners expect, and the margin for error is smaller than you might think.
Industry standards from the Fenestration and Glazing Industry Alliance (FGIA) and the Window and Door Manufacturers Association (WDMA) have formalized measurement procedures that professional installers follow on every job. These aren’t just guidelines for large commercial projects. They apply directly to the residential replacement work happening in homes across Canada every day. Understanding what the pros measure and why puts you in a much stronger position, whether you’re doing the work yourself or supervising a contractor.
Weather Pro’s installation teams follow a three-step process on every project: professional in-home measurement, product demonstration, and a transparent estimate. That sequence exists because measurement accuracy directly determines whether a replacement window fits, performs, and qualifies for its warranty. This guide walks you through the same measurement logic so you arrive at your consultation prepared, or complete your own documentation with confidence.
Key Takeaways
- Take three measurements each for width and height, then use the smallest value when ordering. This is the procedure required by AAMA 2410-13, the North American standard for retrofit window sizing.
- A replacement window must be at least 1/4 inch (6 mm) smaller in both width and height than the measured rough opening to allow for proper installation clearance, per AAMA 2410-13 Section 6.2.2.
- Frame depth is a go/no-go measurement: most replacement windows require at least 3 1/4 inches of depth between interior and exterior stops.
- Check squareness by measuring both diagonals. A difference greater than 1/4 inch may mean a standard replacement insert will not fit correctly.
- Measure width between the jambs, height from the top of the sill (not the interior stool) to the head jamb, and depth between the interior and exterior stops.
- Different window styles follow the same three-point measurement method but have style-specific considerations for sash clearance and operation.
- Recording measurements with labelled sketches and photos significantly reduces ordering errors. Bring documentation to your free estimate appointment.
What Window Replacement Measurement Actually Means
Measuring a window for replacement means capturing the dimensions of the existing rough opening in your wall, not the dimensions of the old window unit sitting in it. The replacement window is sized to fit the opening, so your measurements need to reflect the actual space available inside the frame.
This distinction matters more than most homeowners realize. The rough opening is the framed cavity in the wall structure, defined by the jack studs on each side, the sill at the bottom, and the header at the top. The existing window unit sits inside that opening and is always smaller than the opening. If you measure the old window sash and order a replacement frame based on that measurement, the resulting frame will be too small for your opening.
Industry standards reinforce this directly. AAMA 2410-13, published by the American Architectural Manufacturers Association (now part of FGIA), requires that retrofit window measurements be taken between the pre-existing jambs, with the replacement unit sized at least 1/4 inch smaller than the measured opening in both directions. The standard specifies three horizontal and three vertical measurements to account for any variation in the opening, with the smallest dimension in each direction used to determine the window size. This three-point method is the recognized industry approach for replacement window installation.
Why Measurement Accuracy Matters More Than You Think
A window that is even 1/2 inch too wide for its opening cannot be installed without modifying the rough framing, which turns a straightforward replacement into a structural job. A window that is too narrow creates gaps that require excessive shimming, compromise the seal, and can void the manufacturer’s warranty. Frame depth errors are binary: if your existing frame is shallower than the minimum required by the replacement unit, the window will simply not fit.
The stakes are higher in Canadian climates. A poorly fitted window in Calgary or Edmonton does not just look bad. It allows air infiltration that directly undermines the thermal performance you are paying for. Energy savings from window replacement depend entirely on a tight, properly sealed installation, and that starts with accurate measurement.
The Cost of Getting It Wrong
Measurement errors that result in a mis-sized window typically lead to one of three outcomes: returning the unit and waiting for a correctly sized replacement (adding weeks to the project timeline), modifying the rough opening (adding labour costs and disruption), or accepting a compromised installation that performs below spec. None of these outcomes is cheap or convenient.
The FGIA, the industry body that sets North American fenestration standards, updated its measurement technique recommendations in 2025 to emphasize using a single measuring device consistently across all measurements on a project and selecting a device with adequate precision for the tolerance being worked to. The reasoning is straightforward: instrument variation between measurements introduces cumulative error that can push a borderline fit over the edge.
Standards That Govern the Process
Two organizations set the framework within which professional installers work. FGIA (formed by the merger of AAMA and IGMA) and the Window and Door Manufacturers Association jointly publish standards covering installation and measurement for residential and commercial fenestration. AAMA 2410-13 specifically addresses retrofit window measurement and sizing, and its three-point measurement and 1/4-inch clearance requirements are the baseline that manufacturers, installers, and building inspectors reference.
For Canadian homeowners, these standards translate into practical measurement steps. Weather Pro’s products are manufactured to Canadian climate specifications and installed to these standards, which is why the company’s in-home measurement process is built around the same three-point methodology.
Tools and Equipment Needed for Window Measurement
Accurate window measurement does not require specialized equipment, but using the right tool for each dimension matters. The FGIA’s updated guidance recommends selecting a measuring device with adequate precision and repeatability for the tolerance being worked to, and using a single device consistently across all measurements on a project to eliminate instrument variation.
For most homeowners replacing standard residential windows, a quality tape measure handles width, height, and diagonal measurements. Precision tools become relevant when measuring glass unit thickness or checking edge alignment on specialty glazing.
Tape Measures and Rules
A steel tape measure is the primary tool for all three core measurements: width, height, and diagonal. Choose a tape that locks firmly and has clear markings at 1/16-inch increments. For windows wider than about 36 inches, having a second person hold the far end of the tape keeps it taut and straight, which matters for accuracy. A quality tape from any reputable trade brand is suitable for this work.
Levels, Squares, and Plumb Checks
Checking whether your existing frame is plumb and level is part of a complete measurement assessment. A 4-foot spirit level placed against each jamb tells you whether the frame has shifted over time. A framing square confirms whether corners are at 90 degrees. Professional installers across Canada rely on quality spirit levels and framing squares for this check.
Callipers and Precision Tools
For measuring frame depth precisely or checking the thickness of an existing insulated glass unit, a digital calliper provides accuracy to 0.1 mm. This level of precision is rarely needed for standard replacement work, but it becomes relevant when ordering specialty glazing or verifying that an existing frame can accommodate a triple-pane unit. The FGIA’s 2025 analysis specifically recommends callipers or micrometres for measuring glass thickness and edge alignment, where a tape measure lacks the required resolution. Precision measurement tools of this type are available from established manufacturers.
Laser Distance Meters
Laser distance meters are useful for large windows or situations where a single person is working alone. They reduce the chance of a sagging tape measure introducing error on wide spans. Quality laser distance meters are common in the building trades. For most standard residential windows, a tape measure is sufficient.
Documentation Tools
A notepad, pencil, and smartphone camera are as important as any measuring device. Sketch each window opening, label the three width measurements (top, middle, bottom) and the three height measurements (left, center, right), and photograph the frame from both the inside and the outside. This documentation prevents confusion when ordering and gives your installer a clear picture of what they’re working with before they arrive.
Measuring Window Width, Height, and Depth Accurately
Measuring a window for replacement means measuring the existing opening, not the old window unit sitting in it. The replacement window is sized to fit the opening, so your measurements need to capture the actual space available inside the frame.
“One of the most common mistakes we see is homeowners measuring the old window sash instead of the rough opening. The sash is always smaller than the frame, so you end up ordering a window that’s too small. Always measure between the jambs, from sill to head, and between the stops for depth.” Chris Perry, Project Manager at Weather Pro Windows and Doors
How to Measure Window Width
Width is measured between the two vertical jambs, the side members of the window frame. Take three measurements: one near the top of the opening, one at the middle, and one near the bottom. Record all three, then use the smallest value when ordering your replacement window. This accounts for any bowing or settling in the frame that makes the opening narrower at one point than another.
AAMA 2410-13 requires exactly this three-point horizontal measurement approach, with the smallest dimension used to size the retrofit window. The replacement unit must then be at least 1/4 inch smaller than that smallest measurement to allow for installation clearance.
How to Measure Window Height
Height is measured from the top of the sill to the underside of the head jamb. Take three measurements: one on the left side of the opening, one at the center, and one on the right. Use the smallest of the three.
One important distinction: measure from the top of the sill, which is the sloped or angled surface at the bottom of the frame, not from the interior stool. The stool is the flat trim ledge that extends into the room. Measuring from the stool adds extra height that the replacement window cannot actually use, resulting in a unit that is too tall to fit.
How to Measure Frame Depth
Frame depth is the front-to-back measurement between the interior stop (the small strip of wood or vinyl that holds the sash on the inside) and the exterior stop (the corresponding strip on the outside). Place your tape measure or calliper between these two points and record the measurement.
Most replacement windows require a minimum frame depth of 3 1/4 inches. This minimum is confirmed by industry measurement guidance as the standard threshold for a replacement insert to fit properly. An ideal depth is 3 1/2 inches or more, which gives you more flexibility in window selection. If your frame depth is less than 3 1/4 inches, a standard replacement insert may not be an option, and you may need to consider a full-frame replacement instead.
How to Check for Squareness
Squareness is checked by measuring the two diagonals of the opening: from the top-left corner to the bottom-right corner, and from the top-right corner to the bottom-left corner. Both measurements should be equal in a perfectly square opening.
A difference of up to 1/4 inch is generally acceptable for a standard replacement insert. A difference greater than 1/4 inch means the frame has racked or settled significantly. AAMA 2410-13 and standard installation guidance require diagonal squareness checks as part of the measurement process, and consumer guides confirm that 1/4-inch is the practical limit for standard replacement windows.
Understanding Frame vs. Glass Dimensions
Frame dimensions and glass dimensions are not the same measurement, and confusing them is one of the most reliable ways to order the wrong window. This distinction matters whether you’re ordering a replacement yourself or reviewing a supplier’s quote.
The frame is the outer structure of the window unit: the head, sill, and two jambs that attach to the building opening. The sash is the inner panel that holds the glass and either moves (in operable windows) or is fixed. The insulated glass unit (IGU) is the sealed glass assembly inside the sash. Each of these components has its own dimensions, and they are all smaller than the one that contains them.
Why You Measure the Opening, Not the Glass
When measuring for a replacement window, you are measuring the rough opening in the wall, not the glass size of the existing window. The replacement window manufacturer sizes the frame to fit your opening, then builds the sash and glass to fit within that frame. If you measure the glass and order based on that number, the resulting window frame will be too small for your opening.
The FGIA measurement guidance distinguishes between height, width, and diagonal measurements (taken with a tape measure across the opening) and thickness or edge alignment measurements (taken with callipers on the glass unit itself). These serve different purposes and should not be substituted for each other.
Reading a Window Size Specification
Window sizes are typically expressed as width by height, in that order. A window listed as 36 x 48 inches is 36 inches wide and 48 inches tall. This refers to the overall frame size of the unit, not the glass size. The visible glass area (called the daylight opening) will be smaller, reduced by the frame and sash members on all four sides.
When you provide your rough opening measurements to a supplier, they will size the replacement window frame to be slightly smaller than your opening (by at least 1/4 inch in each direction) to allow for installation. The glass size is determined by the frame size, window style, and profile dimensions.
Double vs. Triple Pane and Frame Depth
Glass configuration affects frame depth requirements. A triple-pane window uses a thicker insulated glass unit than a double-pane unit, so the sash is deeper, and the frame needs to accommodate the additional thickness. If you are upgrading from double to triple pane as part of your replacement, confirm with your supplier that your existing frame depth is sufficient for the thicker unit. This is one reason why measuring depth accurately matters beyond just fitting the frame.
Accounting for Trim and Casing in Measurements
Trim and casing are the decorative wood or vinyl pieces that cover the gap between the window frame and the wall surface. They are installed after the window is in place and do not affect the rough opening measurement. They do affect what you can see and access when measuring, and removing or working around them is sometimes necessary to get accurate numbers.
On the interior side, the casing typically covers the edge of the jamb and the gap between the frame and the drywall. If you are measuring between jambs, you need to measure inside the casing, not from casing edge to casing edge. The jamb is the structural member; the casing is decorative trim applied over it.
Interior Stops and Their Role in Depth Measurement
The interior stop is a small strip of material, usually wood or vinyl, that runs along the inside face of the jamb and holds the sash in place. It is distinct from the casing. When measuring frame depth, you measure from the interior stop to the exterior stop, not from the casing to the exterior wall surface. Getting this wrong produces a depth measurement that is too large, which can lead to ordering a window that sits proud of the frame or does not seal properly.
When Casing Must Be Removed
In some older homes, the casing is installed so that it partially covers the jamb face, making it impossible to get a tape measure cleanly between the jambs without removing trim. In these cases, carefully removing the interior casing before measuring gives you access to the actual jamb-to-jamb dimension. This is common in homes with thick or ornate historic trim profiles.
The US National Park Service notes that replacement windows in historic structures must be compatible with the building’s historic appearance and character, which in practice means that frame dimensions, sightlines, and profiles are constrained by the original design. For Canadian heritage homes with similar constraints, professional measurement ensures the replacement unit is fabricated to the actual opening rather than a standard size that is close but not correct.
Common Window Measurement Mistakes to Avoid
Most measurement errors fall into a small number of predictable categories. Knowing what they are makes them straightforward to avoid.
The table below summarizes the most common mistakes, their causes, and how to correct them.
| Mistake | Why It Happens | Consequence | How to Avoid It |
|---|---|---|---|
| Measuring the sash instead of the opening | Homeowner assumes old window size equals opening size | Window frame ordered too small | Measure between jambs and from sill to head jamb |
| Taking only one measurement per dimension | Seems faster; assumes frame is square | Ordered window may not fit at narrowest or shortest point | Always take three measurements per dimension |
| Measuring from the interior stool instead of the sill | Stool is the visible flat surface; easy to confuse | Window ordered too tall | Measure from the sloped sill surface closest to the window |
| Ignoring frame depth | Depth is not visible and easy to overlook | Replacement insert may not fit the frame at all | Always measure depth between interior and exterior stops |
| Skipping the diagonal squareness check | Not obvious why it matters until the window does not fit | Gaps at corners; window may not operate correctly | Measure both diagonals; flag any difference over 1/4 inch |
| Recording width x height in the wrong order | Industry convention not widely known | Window arrives in wrong orientation | Label every measurement clearly on your sketch |
| Measuring casing to casing instead of jamb to jamb | Casing is the most visible part of the frame | Opening measured too wide; window ordered too large | Identify the jamb behind the casing and measure to it |
The Squareness Check in Detail
Checking squareness is a step many homeowners skip because it is not obvious why it matters. Here is why it does: if your rough opening is not square (meaning the corners are not at 90 degrees), a standard rectangular replacement window will not sit flush in the opening. You will have gaps at the corners, the window may not operate properly, and sealing may become difficult.
To check squareness, measure the diagonal from the top-left corner to the bottom-right corner of the opening, then measure the diagonal from the top-right corner to the bottom-left corner. Both diagonals should be equal. A difference of up to 1/4 inch is generally acceptable for a standard replacement insert. A difference greater than 1/4 inch means the frame has racked or settled significantly, and you should discuss the situation with a professional before ordering.
How to Measure Different Window Types
The three-point measurement method applies to all window styles, but each type has specific considerations based on how it operates and how the sash sits in the frame. Understanding these differences helps you measure accurately and identify any style-specific constraints before ordering.
For a full overview of the window styles available for Canadian homes, the replacement windows guide covers the complete range from casement to specialty shapes.
Measuring Double-Hung and Single-Hung Windows
Double-hung and single-hung windows are the most common window styles in Canadian homes. Double-hung windows have two sashes that both move vertically. Single-hung windows have one fixed upper sash and one operable lower sash. For both styles, measure width between the jambs at top, middle, and bottom. Measure height from the top of the sill to the underside of the head jamb at left, center, and right.
Pay particular attention to the sill condition on hung windows. Older double-hung windows often have a parting bead, a thin strip that separates the two sashes, running down the center of each jamb. The parting bead is part of the original window system and is typically removed when installing a replacement insert. Do not include it in your jamb-to-jamb width measurement.
Measuring Casement Windows
Casement windows open outward on a hinge at one side, operated by a crank. The measurement process is the same: three widths, three heights, one depth, and a diagonal check. The key difference is that casement windows require enough clearance on the hinge side for the hardware and the sash to swing freely. When measuring depth, confirm that the frame is deep enough to accommodate the casement hardware, which can add slightly to the depth requirement compared to a hung window.
Measuring Sliding Windows
Single-slider and double-slider windows have sashes that move horizontally. The measurement method is identical to hung windows, but rotated: width is the longer dimension and height is the shorter one in most slider configurations. Confirm which sash is operable (in a single-slider, only one panel moves) and note whether the operating sash is on the left or right, as this affects the replacement unit’s hardware orientation.
Measuring Bay and Bow Windows
Bay windows and bow windows are composite assemblies: multiple window units joined at angles to project outward from the wall. Measuring for a bay or bow replacement is significantly more complex than measuring a single window. You need the overall width of the rough opening, the projection depth (how far the unit extends from the wall), the height of each individual window unit within the assembly, and the angle of the side units (typically 30 or 45 degrees for bay windows).
Because of this complexity, bay and bow window measurement is almost always best handled by a professional. Errors in projection depth or angle specification result in units that do not fit the structural opening and cannot be easily corrected on site.
Measuring Tilt and Turn Windows
Tilt-and-turn windows use a single handle that operates in two modes: tilting the sash inward at the top for ventilation, and fully swinging the sash inward for cleaning or egress. These European-style windows have specific frame depth and hardware clearance requirements that differ from North American hung or casement designs. Measure width, height, and depth using the standard three-point method, but confirm with your supplier that the frame depth is sufficient for the tilt-and-turn hardware assembly before ordering.
Recording and Documenting Your Measurements
A measurement is only as useful as the record you keep of it. Homeowners who arrive at a consultation with clear, labelled documentation get faster, more accurate quotes and reduce the chance of ordering errors.
The standard documentation approach is straightforward. For each window opening, create a simple sketch showing the front view. Label the three width measurements (top, middle, bottom) and the three height measurements (left, center, right). Record the frame depth. Note the diagonal measurements and whether the opening is square. Add any observations about the condition of the frame, sill, or surrounding trim.
Labelling and Organizing Multiple Windows
If you are measuring more than one window, assign each opening a number or location label (for example: “Living Room South,” “Bedroom 1 East”) and keep measurements grouped by opening. Mixing up measurements from different windows is a common source of ordering errors, especially when several openings are similar in size.
Photograph each opening from the inside and outside before you measure. Photos capture details that sketches miss: the condition of the sill, the type of trim, whether a storm window is in place, and the general state of the frame. These details matter to your installer and can affect the installation approach.
Using Manufacturer Measurement Forms
Many window manufacturers provide standardized measurement forms or online ordering tools that prompt you to enter each dimension in a specific format. Using these forms ensures you capture every required measurement and present it in the format the manufacturer needs to fabricate your window correctly. Weather Pro’s consultation process includes professional measurement as part of the service, so your specialist will complete this documentation during the in-home visit. Getting started is fast, easy, and free.
Best Practices for Window Replacement Measurement
Following a consistent process eliminates most measurement errors before they happen. These practices are drawn from AAMA 2410-13 and established industry measurement guidance.
- Take three measurements per dimension, always. One measurement assumes the frame is perfectly straight. Three measurements reveal any bowing, settling, or racking that changes the usable opening size. Use the smallest value in each direction.
- Measure the opening, not the existing window. The old sash is always smaller than the rough opening. Measuring it yields a number that is too small, resulting in a replacement unit that rattles or requires excessive shimming.
- Measure depth before you order anything. Frame depth is a go/no-go constraint. If your existing frame is shallower than 3 1/4 inches, a standard replacement insert will not fit. Discovering this after ordering wastes time and money.
- Check squareness with diagonal measurements. A difference of more than 1/4 inch between the two diagonals means the opening has racked. Standard replacement inserts are rectangular; they will not sit flush in a significantly out-of-square opening.
- Use a single measuring device throughout the project. Switching between a tape measure and a laser meter introduces instrument variation. Pick one device and use it for all measurements on the same project.
- Document with sketches and photos, not just numbers. A list of numbers without context is easy to misread. A labelled sketch with photos of each opening eliminates ambiguity when ordering or discussing the project with an installer.
- Measure from the sill, not the stool. The interior stool is the flat trim ledge visible from inside the room. The sill is the sloped structural surface below it. Height measurements must start from the sill, not the stool.
- Account for installation clearance in your order. Your measurements capture the rough opening. The window you order must be at least 1/4 inch smaller in both width and height than your smallest measurements. Do not order a window the exact size of your opening.
When to Call a Professional Measurer
Most standard single-window replacements in a square, well-maintained frame are within a careful homeowner’s reach. Several situations call for professional measurement to avoid costly errors.
The window replacement process guide outlines what to expect at each stage, including the measurement visit.
Situations That Require Professional Measurement
- Out-of-square openings. If your diagonal measurements differ by more than 1/4 inch, a professional needs to assess whether the frame can be shimmed and corrected or requires a full-frame replacement.
- Bay and bow windows. The angle, projection, and multi-unit coordination of these assemblies require professional measurement tools and experience.
- Historic or non-standard openings. Older homes often have openings that are not standard sizes, have unusual trim profiles, or have been modified over time. Professional measurement ensures the replacement unit is fabricated to the actual opening.
- Commercial or multi-unit projects. When replacing windows in apartment buildings, commercial spaces, or institutional buildings, measurement errors multiply across many units. Professional measurement is standard practice for these projects.
- Tilt and turn systems. European-style tilt-and-turn windows have specific frame depth and hardware clearance requirements. A professional familiar with these systems can confirm compatibility with your existing opening.
- Any project where you are unsure. If a measurement does not look right, or if the frame condition raises questions you cannot answer, a professional consultation costs nothing and can prevent an expensive mistake.
Weather Pro provides free in-home consultations that include professional measurement at no obligation. For homeowners unsure about any aspect of their measurements, booking a consultation is the lowest-risk way to get an accurate quote.
Conclusion: Measure Once, Install Right
Accurate window measurement is the single most controllable factor in a successful replacement project. The process is systematic, the tools are simple, and the standards are clear: three measurements per dimension, the smallest value used for ordering, at least 1/4-inch clearance from the rough opening, and a diagonal squareness check before you commit to any order. Follow these steps, and you eliminate the most common and costly mistakes before they happen.
For homeowners planning a replacement project in any of Weather Pro’s 12 Canadian markets, the free in-home consultation includes professional measurement by a trained specialist, a product demonstration, and a transparent, no-obligation estimate. Over 30,000 Canadian homeowners have trusted Weather Pro’s process, and it starts with getting the measurements right.
Book your free estimate today and let a Weather Pro specialist handle the measurement so you can focus on choosing the right window for your home.
Frequently Asked Questions
How do I measure a window for replacement if I have never done it before?
Start by measuring the width between the two vertical jambs (the side members of the frame) at three points: top, middle, and bottom. Then measure the height from the top of the sill to the underside of the head jamb at three points: left, center, and right. Use the smallest measurement in each direction when ordering. Also measure the frame depth between the interior and exterior stops, and check squareness by comparing the two diagonal measurements of the opening.
What is the minimum frame depth needed for a replacement window?
Most replacement windows require a minimum frame depth of 3 1/4 inches between the interior and exterior stops. This is the standard minimum, as confirmed by industry measurement guidance, for a replacement insert to fit properly. A depth of 3 1/2 inches or more is ideal and gives you more flexibility in window selection. If your frame depth is less than 3 1/4 inches, a full-frame replacement may be required instead of a standard insert.
Why do I need to take three measurements instead of one?
Window frames settle, bow, and rack over time, meaning the opening is rarely perfectly uniform from top to bottom or side to side. Taking three measurements at different points along each dimension reveals the narrowest or shortest usable space in the opening. Using the smallest measurement ensures the replacement window fits at every point, not just at the widest or tallest spot.
What happens if my window opening is not square?
A difference of up to 1/4 inch between the two diagonal measurements is generally acceptable for a standard replacement insert. A difference greater than 1/4 inch means the frame has racked or settled significantly. In this case, you may need to shim and adjust the opening before installation, or consider a full-frame replacement. A professional measurement visit can assess the situation and recommend the right approach.
Should I measure the glass or the frame when ordering a replacement window?
Measure the rough opening in the wall, not the glass or the sash of the existing window. The replacement window manufacturer sizes the frame to fit your opening, then builds the sash and glass to fit within that frame. Measuring the glass gives you a number that is too small, resulting in a replacement frame that will not fit your opening correctly.
How much smaller should a replacement window be than the rough opening?
AAMA 2410-13, the North American standard for retrofit window sizing, requires that a replacement window be at least 1/4 inch (6 mm) smaller in both width and height than the measured rough opening. This clearance allows for installation, shimming, and sealing. Do not order a window the exact size of your opening.
Can I measure windows myself or do I need a professional?
Most standard single windows in square, well-maintained frames can be measured accurately by a careful homeowner using a tape measure, a level, and a notepad. Professional measurement is recommended for bay and bow windows, out-of-square openings, historic homes with non-standard trim, and any multi-unit or commercial project. When in doubt, a free in-home consultation with a specialist eliminates the risk of ordering errors.