
Door weatherstripping fails when the gasket no longer compresses evenly around the slab, so you reseal an entry door by matching the worn jamb profile and the bottom sweep, then closing the leaf until the latch still pulls it into the stop. A new strip that is too fat, too hard, or sitting on a racked frame will leak the same way the old one did.
Those failures show up as daylight at a corner, a cold line at the lock stile, grit that never stops blowing in, or a sweep that has curled off the threshold. They also show up as a door that suddenly will not latch after someone stacked a thicker bulb “to kill the draft.” The gasket is a moving joint. It has to squash and recover every time you open the door.
This article covers how to spot door weatherstripping failures, how jamb seals differ from a door sweep and an adjustable threshold, how to reseal a typical Canadian entry without fighting the latch, which mistakes leave the foyer cold, and when the honest next step is a full unit rather than another hardware-store roll.
Key Takeaways
- A seal that stays flattened, tears, or pulls out of the kerf is finished. Bounce-back is the test, not the vinyl colour.
- Paper that slides free under a closed, latched door marks a gap. Paper that tears or grips marks compression. Map the pattern, then pick the part.
- Jamb weatherstrip seals the head and sides. A sweep and threshold seal the bottom. No single product does both jobs.
- Kerf-in gaskets on a pre-hung steel or fibreglass unit want a matching profile, not the thickest foam on the shelf.
- Adhesive tape hates cold, dust, and a painted stop that was never cleaned. Install on a dry, warm surface or expect it to peel in January.
- Too much compression holds the latch off the strike. Too little leaves the draft you were trying to stop.
- Soft sills, split kerfs, and a leaf that never sits in plane are past a gasket swap. Replace the entry as a system.
How to spot door weatherstripping failures
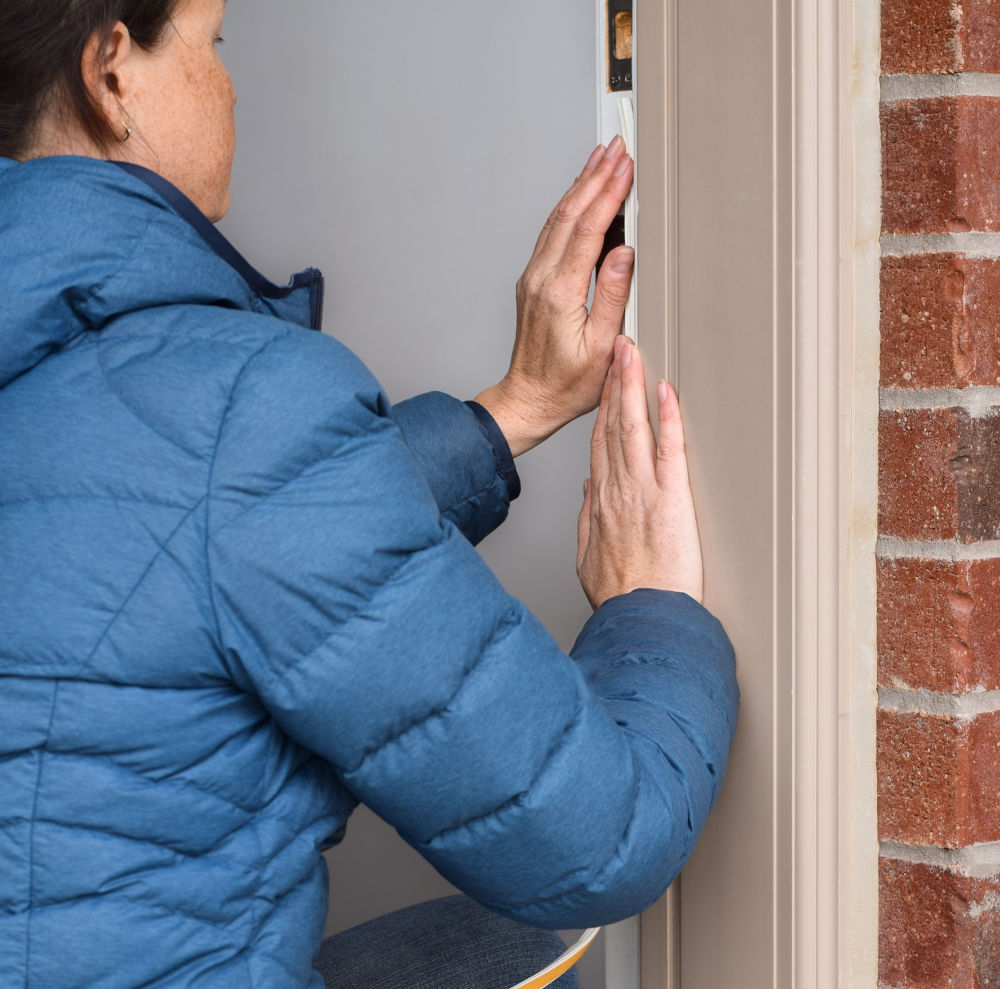
Spotting door weatherstripping failures is a perimeter job, not a stare at the middle of the slab. Close and latch the door. Stand inside with the foyer lights off and look for daylight at the head, lock stile, hinge stile, and sill. A bright line at one upper corner is a different diagnosis from a glow under the entire bottom rail. Write the locations down. You will forget which corner you meant once you start pulling old vinyl.
Then put your hand on the same path. Alberta’s Utilities Consumer Advocate tells homeowners that about 25 percent of home heat loss comes from leaks around windows and doors, and it puts door frames, seals, and weatherstripping at the top of its air-leak checklist. Feel for a temperature change, not only a breeze. A lock-side leak often reads as a cold stripe on the casing rather than a wind you can hear.
A paper test makes that leak visible. Save on Energy’s air-leak advice is blunt: shut a door on a piece of paper; if you can pull it out, you have a gap. Do it at the head, mid-lock, mid-hinge, and the sill. You are looking for a pattern, not a single pass or fail.
- Loose along the whole lock edge, tight on the hinges: the latch is not pulling the slab into the stop. The gasket never gets a chance.
- Loose only at the top of the lock stile: the slab has dropped. Hinges first, then seals.
- Loose only at the floor: sweep, threshold, or both. Jamb foam will not reach it.
- Loose everywhere, with a gasket that feels like hard plastic: the weatherstrip itself has taken a set.
- Tight enough to tear the paper at one corner and free at the opposite corner: the leaf is not in plane with the frame.
Press the gasket with a thumb. Natural Resources Canada’s materials chapter is the right test here. Look for products that are flexible and that spring back to their original shape quickly. A bulb that stays dented, a fin that stays folded, or a kerf flange that has torn out of the slot is not “dirty.” It is spent. The same page notes that some products get hard and less effective in cold weather, which is exactly when a Canadian entry is asked to work.
Visible damage is easier. Tears at the latch, missing chunks at the bottom corners, vinyl that has gone gummy from sun on a south elevation, and pile that has matted into a hard ridge all fail. Corner pads at the sill, if the unit ever had them, are often the first pieces to walk off. Dirt packed into a tubular seal looks like a gasket and behaves like a stick.
Do the incense or smoke check only with the furnace off and exhaust fans on, the way the Alberta DIY audit describes, and keep flame away from vinyl. A thermal camera is a luxury. Your hand and a strip of paper already tell you whether the joint is sealing.
“A paper test that slides free at the lock and grips at the hinges is not a gasket problem. The slab is not landing on the stop. New weatherstrip cannot invent compression the latch never creates,” says Chris Perry, Project Manager at Weather Pro Windows and Doors.
Walk the exterior too. Failed caulk at the brickmould, a gap at the threshold ends, and ice that grows from the sill into the sweep are not gasket issues even though they feel like a drafty door. Weatherstripping seals the moving joint between slab and frame. Caulk seals the frame to the wall.
Jamb seals, door sweeps, and adjustable thresholds
An entry door uses two different joints. The head and the two jambs are compression seals. The slab swings into a stop or into a kerf gasket and squashes a bulb, a tubular profile, or a V-strip. That seal works only if the door actually finishes its swing and the latch holds it there. The bottom is a sliding joint. A sweep, a door shoe, or a threshold cap meets the sill every time you walk through. It wears first because it drags.
Treat those as separate shopping lists. Homeowners often buy a roll of foam for a leak they can see under the door. Foam on the stop does nothing at the floor. A sweep on a door that daylight-shows at the head does nothing at the lock. Name the leak, then name the part.
Compression seals on the head and jambs
Most modern pre-hung steel and fibreglass entries use kerf weatherstripping: a rigid barb pressed into a slot in the jamb, with a flexible bulb or fin facing the slab. The kerf is the track. The gasket is the tyre. Pull a short sample from an inconspicuous spot and take it to the counter. The same NRCan chapter tells you to bring a sample of the old material so you buy the correct product. A “universal” foam that is 2 mm too proud will feel snug and then refuse to latch.
Older wood frames often use nail-on or screw-on metal carriers with a vinyl insert, or adhesive V-strip on the stop. Magnetic seals show up on some steel doors. They need a clean, flat face, and they dislike frost. Felt mats. It is a poor match for grit, snow, and daily traffic.
Common families are adhesive foam or rubber tape, V-strips, tubular rubber or vinyl, and door sweeps. The product has to seal when the door is closed and still let it open without a hip check. Compression you can barely overcome is not a seal. It is a jam.
Sweeps, shoes, and the sill
The sweep is a fin, bulb, or brush on the bottom of the slab. Screw-on face-mount sweeps are the usual DIY fix. U-shaped door shoes wrap the bottom rail and often require the leaf to be removed from the hinges. Automatic door bottoms drop a seal as the door closes. They need a square bottom rail. They are not a first swap for a worn vinyl fin.
The threshold is the other half of that joint. Many residential sills have adjustment screws under small plugs. Someone often lowered the cap years ago because the door scraped in a wet July, then never raised it when the wood dried. Raise in small turns, close the door, and stop when the sweep kisses the cap along the full width. If one end still shows daylight after the other is dragging, the sill isn’t level, or the slab isn’t hanging square. Cranking only the high side will not invent a plane.
Corner leaks at the bottom are classic. The jamb gasket ends, the sweep starts, and a triangle of air remains. Corner pads exist for that junction. If yours are missing, replacing only the long kerf run will still leave a whistle at each bottom corner.
The sill is a high-value, hard-to-seal line. Use durable, replaceable material that can take traffic and still flex with humidity and temperature. A cardboard draft snake on the floor is a winter costume, not a repair. A rotten or heaved threshold is not a sweep problem. Water under the sill is a framing problem.
How to reseal an entry door
Resealing an entry door is profile matching plus clean installation, then a latch check. Do not start by stretching fat foam over a gap that changes from 2 mm at the head to 8 mm at the lock. Measure the closed gap at several points. If the numbers disagree by more than a few millimetres, fix the hang and strike before you buy gaskets. A seal can take a small seasonal change. It cannot hide a dropped slab.
Work on a dry day if you can. Adhesive products need a clean, dry, reasonably warm spot. Kerf products are more forgiving of temperature, but ice in the slot will still keep the barb from seating. Clear snow and grit from the sill before you judge the sweep.
Have the right pieces on the floor before you pull the old run:
- A matching kerf gasket, or the carrier and insert your frame actually uses
- A sweep or shoe that matches the bottom-rail thickness
- Corner pads if the original unit used them
- Mild soap, a rag, and time to let the jamb dry
- Scissors or snips, a tape measure, and a small screwdriver for remnants
- The old sample in a bag so you do not guess at the store
Apply gaskets to clean, dry surfaces. Use one long strip along each side, and make the material meet tightly in the corners. A mitre that leaves a 3 mm hole at the head is a designed leak.
Kerf-in jamb gaskets
Work the kerf run in this order:
- Pull the old gasket from the head, then the sides. Fish remnants with needle-nose pliers. Do not gouge the slot.
- Vacuum the kerf and wipe the jamb faces so grit doesn’t grind the new bulb.
- Cut the head piece to full width, square, not stretched. Press the barb in with the bulb facing the same direction as the old one.
- Seat it by hand along the full run. A roller helps. A screwdriver blade cuts vinyl.
- Measure each side jamb and cut a hair short so the sides tuck to the head gasket instead of buckling it. Press from the top down.
- At the sill, meet the sweep or the corner pad. Do not leave the gasket floating 10 mm above the threshold.
If you reverse the bulb, the door will miss the seal or crush it into a hard ridge. If the kerf is split or the wood is punky, the barb has nothing to hold. Silicone in a loose kerf is a temporary hold, not a rebuild.
Close the door slowly. You should feel even resistance in the last centimetre, then the latch should enter without a slam. If you need a hip, the profile is too tall, or the leaf is already tight. Pull it and go thinner. If you feel nothing, you undersized it, or the slab isn’t reaching the stop.
Adhesive foam and V-strip on older stops
Peel the old tape. It will take paint. Scrape residue until the stop is a real surface. Wash, rinse, dry. Alcohol on a test patch is fine if the finish can take it. Do not use mineral spirits on rubber you intend to keep. Stick foam only when the jamb is warm enough for the adhesive. Winter garage installs fail in a week.
Cut pieces long, then trim. Do not stretch foam as you go. Stretched foam recovers and opens a gap. V-strip sits in the rabbet so the V opens against the door edge. It can forgive a little seasonal warp, which is why NRCan still likes a quality V-shaped vinyl on older frames. It will not forgive a 10 mm twist.
Test the latch before you commit the last metre. Foam that looked modest on the roll can stack with existing stop thickness and hold the bolt off the pocket. If that happens, you have not “sealed harder.” You have built a door that is not locked.
Door sweeps and threshold caps
Measure the door width and cut the sweep so it does not drag the jambs. Face-mount sweeps usually have slotted holes. Close the door, hold the sweep so the fin makes light contact with the threshold, mark, drill pilot holes, and start the screws loose. Operate the door. Adjust height. Then tighten.
A fin that is crushed flat every time it closes will die in a season. A fin that never touches will leak every season. Light, continuous contact is the target. If the threshold is adjustable, use that first. Turn a quarter turn at a time across all screws to keep the cap from tilting into a ramp.
If the bottom rail is rotten, thin, or already Swiss-cheesed with old screw holes, a new sweep is hanging by a thread. Same verdict if the sill rocks, the oak or composite cap is split, or water stains the interior floor after every thaw. That is replacement territory, not a longer screw.
Mistakes that leave a drafty front door
A drafty front door after a weekend of sealing is almost never a mystery. Someone sealed the wrong joint, stacked thickness onto a twist, or ignored the wall around the frame. The gasket can only close the gap that exists when the door is latched.
Watch for these:
- Buying by thickness. The thickest bulb wins in the aisle and loses at the strike.
- Skipping the latch check. A door that will not latch is not sealed. It is propped.
- Foam on a dirty, cold stop. The tape lets go. You blame the brand.
- A new sweep on a heaved sill. The fin wears on the high side and still leaks on the low side.
- Sealing the stop and ignoring the brickmould. Air comes around the frame, not through it.
- Leaving corner gaps. Four long runs with open mitres are still a rectangle of leaks.
- Planing a wood door in August, then packing winter foam. You created the winter gap, then overfilled it.
- Storm-door sequence. A storm that slams the entry leaf bounces the latch and unloads the gasket.
Window weatherstripping is a cousin, not a kit. Weather Pro’s guide to winterizing windows for a Canadian winter is the sash-and-caulk sequence. An entry has a heavier leaf, a threshold that takes boots and salt, and a latch that has to compress the seal on purpose. Do not treat a front door like a casement crank.
Steel doors and fibreglass entry doors both depend on that compression. The skins do not take up moisture the way a wood slab does, so homeowners assume the gasket is the only moving part. The jamb is still wood or composite. The sill still sits on a floor that heaves. A steel skin will not square a racked opening. Neither will a new kerf run.
If the door still leaks after honest new gaskets, stop adding layers. Check hinge screws, the strike, the threshold, the caulk line, and whether a storm door is fighting the entry. Extra foam on a proud corner just moves the leak.
When resealing cannot save the opening
Gasket work is for a square, sound unit whose seals have simply aged. Replacement is for an opening that will not stay square, a slab that will not stay flat, or a sill that is already feeding water into the floor. A matching kerf gasket is the right job when that is actually the job.
Replacement starts to be cleaner when you can point to structure:
- The kerf is split, or the stop is chewed beyond a new carrier.
- The sill is soft, stained, or pulled away from the floor.
- Daylight remains after new gaskets, a tuned threshold, and tight hinges.
- Insulated glass in the slab or a sidelite is fogged between panes.
- The leaf is twisted. One corner is always proud of the stop.
- Ice grows from the threshold into the house after every thaw.
- You have already stacked two generations of weatherstripping, and the draft came back.
A new leaf hung in a tired jamb keeps the leak. ENERGY STAR ratings belong to a tested assembly, not to a slab you dropped onto old hinges. Ask for a full entry system: frame, sill, weatherstrip, and a hang that is checked for latch and seal before the crew leaves. Weather Pro’s exterior and entry doors page is the product conversation for steel and fibreglass replacements with glass inserts and sidelites. Size and hang still start at the opening you have.
“If the kerf is split, the sill is soft, or you are stacking a thicker bulb every fall, stop shopping weatherstrip. Measure the opening and replace the unit so the gasket and the frame are the same rectangle,” says Chris Perry, Project Manager at Weather Pro.
Cost is a different page. Installed pricing ranges for a typical Canadian single entry live in the guide to how much a front door costs in Canada. Use that article when you are budgeting a system. Use this one when you are deciding whether the gasket is still a Saturday job.
A proper door replacement includes insulation around the frame, a threshold that sheds water out, and weatherstripping that compresses when the latch clicks. If a quote cannot describe that seal check, you are buying a leaf.
| What you find | Likely cause | Sensible next step |
|---|---|---|
| Flattened or torn bulb, paper slides all around | Gasket has lost spring | Replace matching kerf or carrier insert |
| Paper free at lock, tight at hinges | Latch not pulling slab in | Adjust strike or hinges, then reseal |
| Daylight only at the floor | Worn sweep or low threshold | New sweep, then raise cap in small turns |
| Drag on one end of the sill | Unlevel threshold or dropped slab | Level the hang before a fatter fin |
| New foam, door will not latch | Profile too thick or stacked | Thinner seal, do not file the strike first |
| Soft sill, split kerf, fogged glass | Failed unit, not a gasket | Full entry replacement |
Two problems can stack. A slightly dropped slab plus a hardened lock-side bulb plus a cold snap is a classic Canadian week. Fix hang, then match the gasket, then set the sweep.
A sealed entry is a square leaf and a gasket that still springs
Door weatherstripping earns its keep only when the slab lands on it. Spot failures with daylight, a thumb test for bounce-back, and a paper map of the perimeter. Reseal with the profile the frame was built for, a sweep that kisses the threshold, and corners that actually meet. Leave the fat-foam shortcut on the shelf.
If the opening is still leaking after that sequence, you are not one roll away from comfort. You are looking at a hang, sill, or a unit that has finished its service life. Front door replacement then is the envelope job, not a cosmetic slab.
When you want the opening measured and a written scope that includes the frame, the sill, and the seal check, get a free in-home estimate. Bring the paper-test notes. They tell the visit where the joint actually failed.
Frequently Asked Questions
How do I know my door weatherstripping needs replacing?
Close and latch the door. Look for daylight, feel for a cold line, and run a paper test at several points. If the gasket stays flattened when you press it, tears, pulls out of the kerf, or feels hard in the cold, it is due. Dirt packed into a tubular seal can look intact and still leak. Replace the profile that matches the frame, not a thicker substitute.
Why is my door still drafty after new weatherstripping?
The leak may be under the door, around the frame, or at a corner the long runs never closed. A sagging slab can compress one edge and leave the other open. Too-thick foam can also keep the latch from pulling the leaf in, so the new gasket never loads. Check hinges, the threshold, exterior caulk, and the storm door sequence before you buy a second roll.
Do I need a door sweep or jamb weatherstripping?
Use jamb weatherstripping for leaks at the head and sides. Use a sweep, a door shoe, or a threshold adjustment for leaks at the floor. Most entries need both, because they are two different joints. A sweep will not stop a lock-side whistle. Foam on the stop will not stop a glow under the bottom rail.
Can weatherstripping stop an entry door from latching?
Yes. A bulb that is too large, doubled, or compressed on a twisted leaf holds the slab short of the strike. New weatherstripping on a square door should compress in the last bit of travel and still let the latch enter. If you need extra-thick strip to kill a corner draft, the leaf is not in plane with the frame.
Should I replace weatherstripping in winter?
You can pull and press kerf gaskets in the cold if the slot is ice-free. Adhesive foam and V-strip want a clean, dry, warm spot, or the tape will let go. If you must seal during a cold snap, use a mechanical kerf or screw-on carrier, not peel-and-stick foam, and retest the latch before you call it done.
Do I have to take the door off the hinges to reseal it?
Usually no. Kerf gaskets, face-mount sweeps, and adhesive stop seals install with the leaf hung. You pull the door for a U-shaped shoe that wraps the bottom rail, or for a bottom sweep that mounts on the underside rather than the face. Have a second person if you pull hinge pins. An insulated entry slab is heavy.
How often should I replace door weatherstripping?
No calendar fits every house. High-traffic front doors, south sun, salt, and grit shorten a sweep’s life first. Adhesive tape usually dies sooner than a kerf bulb. Inspect every heating season. Replace when bounce-back is gone, not when a round number of years has passed.
When should I replace the whole entry instead of resealing?
Replace when the kerf or stop is destroyed, the sill is soft, glass inserts are fogged, the slab is twisted, or daylight remains after new gaskets and a square hang. A new gasket on a failed frame will look tidy for a month. Measure the opening and replace the unit so the weatherstrip, the latch, and the sill are built together.