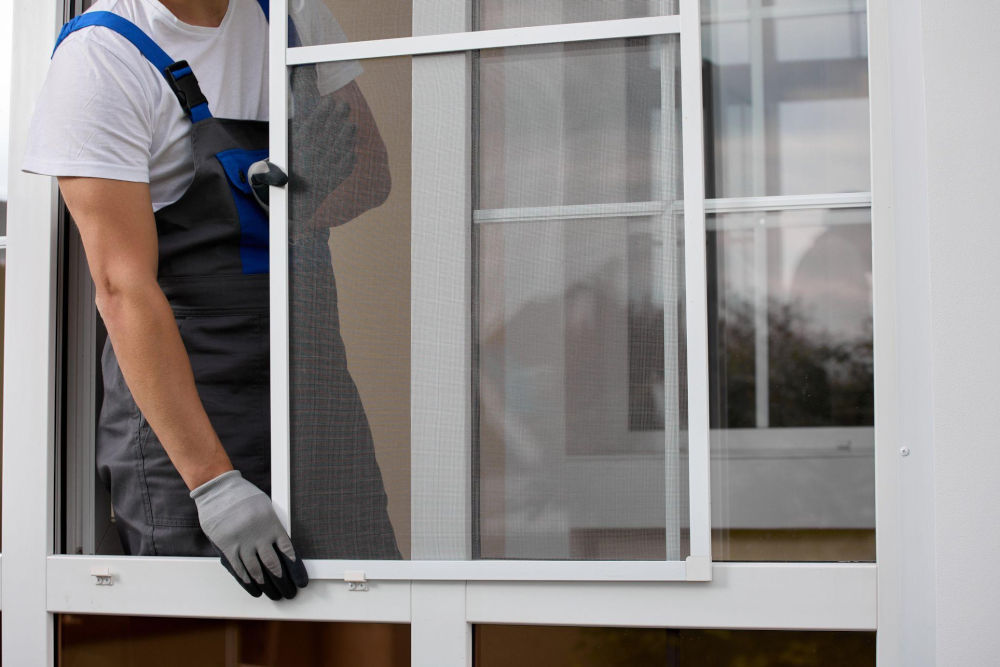

Window screens are one of the most overlooked components of a well-maintained home. They keep insects out, allow fresh air in, and protect your interior from debris, yet most homeowners only notice them when they fail. A torn mesh, a bent frame, or a screen that no longer fits properly can compromise comfort and invite pest problems through the warmer months. The good news is that window screen replacement sits squarely in the category of home maintenance tasks that budget-conscious homeowners can handle themselves.
Maintenance spending is at a record high across Canada and the United States. Average per-owner maintenance spending reached $1,200 in 2023, a new high according to Harvard’s Joint Center for Housing Studies (JCHS). Screen replacement is exactly the kind of small-envelope task that keeps that number from climbing higher by preventing bigger problems down the road. A failing screen that goes unaddressed invites insects, accelerates frame corrosion, and can signal to potential buyers that a home has been neglected.
This guide walks you through everything you need to know: how to assess your screens, which materials suit different needs, the tools required, a step-by-step replacement process, and when it makes more sense to call a professional. Whether you are replacing a single torn panel or refreshing every screen in the house before summer, you will find clear, practical guidance here.
Key Takeaways
- Window screen replacement is one of the most accessible DIY home maintenance tasks, requiring basic tools and modest material costs, typically between $20 and $60 Canadian for one to three screens.
- Screen mesh comes in several materials, including fibreglass, aluminum, pet-resistant polyester, and solar fabric, each suited to different priorities such as durability, visibility, or sun control.
- The spline-and-groove system is standard across most residential windows; understanding it makes replacement straightforward for most homeowners.
- DIY projects cost $2,600 on average in 2023, compared with $7,800 for professionally installed projects, underscoring the savings potential of tackling small tasks yourself.
- Approximately 17% of homeowners have damaged their homes while attempting DIY repairs, incurring average additional costs of $599, so following a clear process matters.
- Screens should be inspected at least twice a year: before the warm season and again before winter storage.
- When windows are older, failing, or no longer energy-efficient, replacing the screens alone may not be enough. Full window replacement becomes the better long-term investment.
- Home maintenance projects were completed by 72% of homeowners in Q2 2026, making maintenance the most common project category despite overall activity softening.
What Window Screen Replacement Actually Involves
Window screen replacement is the process of removing a damaged or deteriorated screen mesh from its frame, installing new mesh material, and securing it with a flexible spline cord seated in the frame’s perimeter groove. The result is a screen that fits the original window opening and performs as intended: admitting air and light while blocking insects and debris.
Most residential screens use the same fundamental construction regardless of window type or manufacturer. A rigid frame, typically made of aluminum or vinyl, has a continuous groove along its inner perimeter. A flexible spline cord locks the mesh into that groove under tension. Understanding this system is the foundation of every repair and replacement decision covered in this guide.
The scope of a screen replacement project can range from re-screening a single frame in under 30 minutes to building new frames from scratch for non-standard window openings. Both are within reach for most homeowners with basic hand tools and a clear process.
Why Screen Maintenance Matters Right Now
Home maintenance spending is at a historically elevated level, and the data show that deferred maintenance consistently costs more than timely upkeep. Understanding the broader context helps explain why a small task like screen replacement deserves attention rather than postponement.
Cost pressure is driving more homeowners to delay repairs, and the consequences are measurable. Survey data shows that 59% of homeowners have delayed necessary repairs due to cost, and 42% have ignored maintenance issues because of cost anxiety. Among those who ignored the problems, 26% reported that the issues worsened. For window screens, a $30 re-screening job left undone can lead to insect infiltration, frame corrosion, and eventually a more expensive full-frame replacement.
The DIY orientation of budget-conscious homeowners is well-documented, but so are its risks. About 3 in 4 homeowners always try to fix an issue themselves before calling a professional, yet 17% report damaging their home or appliances in the process, with average additional damage costs of $599. A clear, step-by-step process eliminates most of that risk for a task as accessible as screen replacement.
The broader home improvement market provides useful context on where screen replacement fits. Total home improvement spending in the United States reached $827 billion from 2021 to 2023, with DIY projects accounting for 36% of the project count in 2023. Screen replacement sits firmly in the DIY-appropriate category: low materials cost, no specialized licensing required, and a forgiving learning curve. The typical DIY project cost $2,600 in 2023 versus $7,800 for a professionally installed project, and screen replacement comes in well below even the DIY average.
Maintenance participation remains high despite softening in overall project volume. 75% of owners spent on home maintenance in both 2019 and 2023, with the number of households doing maintenance rising from 60 million to 65 million over that period. Screen care is a natural part of that routine, and the homeowners who build it into their seasonal schedule consistently spend less on reactive repairs.
Types of Window Screens and Materials
Window screen mesh is the woven or knitted material stretched across a frame to admit air and light while blocking insects and debris. Choosing the right mesh type before you buy anything else will save you time, money, and a second trip to the hardware store.
The frame and mesh work together as a system. A frame that fits poorly will let insects in regardless of mesh quality, and a high-performance mesh installed in a warped frame will underperform. Understanding both components helps you make smarter purchasing decisions before you start.
Fiberglass Mesh
Fibreglass is the most common residential screen material and the default choice for most replacement projects. It is flexible, crease-resistant, and easy to work with during installation. Fibreglass mesh will not corrode, making it a practical option in coastal or humid climates where salt air and moisture accelerate deterioration in metal screens.
The main limitation of fibreglass is durability under physical stress. It tears more easily than aluminum when pushed or scratched, making it a poor choice for households with pets or young children who regularly press against screens.
Aluminum Mesh
Aluminum mesh is stiffer and more puncture-resistant than fibreglass. It holds its shape well over time and is a good choice for windows that see frequent contact or are in exposed locations. The trade-off is that aluminum creases permanently if bent, and once creased, the screen looks damaged even if it still functions.
Aluminum mesh is also slightly more reflective, which can reduce glare in rooms with direct sun exposure. In Canadian climates, aluminum performs well through freeze-thaw cycles without becoming brittle.
Pet-Resistant and Heavy-Duty Polyester
Pet-resistant screens use a heavier-gauge polyester weave that is significantly stronger than standard fibreglass. These screens are designed to withstand scratching, pawing, and the general pressure that pets apply to screens near ground level or at door height. The mesh is typically coated or woven tightly enough to resist tearing under moderate force.
The cost is higher than standard mesh, but for households with cats or dogs, the investment pays off quickly by avoiding repeated replacements.
Solar and Sun-Control Screens
Solar screens use a tightly woven fabric, often polyester or fibreglass with a special coating, designed to block a portion of solar radiation before it enters the window. They reduce glare, lower cooling loads in summer, and provide daytime privacy by limiting visibility from outside.
The trade-off is reduced airflow and a darker interior view. Solar screens work best on south-facing and west-facing windows that receive direct afternoon sun. They are not ideal for rooms where maximum ventilation or unobstructed views are the priority.
Screen Frame Materials
The frame holds the mesh and fits into the window opening. Most residential frames are aluminum: lightweight, durable, and available in standard sizes at any hardware store. Vinyl frames are also available and offer slightly better thermal performance, though they are less common in replacement applications.
Frame corners use plastic or metal connectors that slot into the frame channel. These connectors are often the first point of failure in older screens, and replacing them is inexpensive when you are already re-screening.
Tools and Supplies Needed for Screen Replacement
Gathering the right tools before you start is the single most effective way to avoid a frustrating mid-project hardware run. Screen replacement requires only a handful of items, most of which are inexpensive and reusable across multiple projects.
The total materials cost for a standard DIY screen replacement is modest. For most homeowners replacing one to three screens, expect to spend between $20 and $60 Canadian on mesh, spline, and basic tools, depending on mesh type and frame condition.
Essential Tools
You will need the following before starting any screen replacement:
- Spline roller: A small hand tool with a convex wheel on one end and a concave wheel on the other. The convex side presses the new spline into the frame groove; the concave side is used for initial alignment. This is the most important specialized tool for the job.
- Utility knife or scissors: For trimming excess mesh after the spline is seated.
- Flathead screwdriver or awl: For removing old spline from the frame groove without damaging the channel.
- Measuring tape: For cutting mesh to the correct size before installation.
- Marker or chalk: For marking cut lines on the mesh.
- Work surface: A flat table or workbench large enough to lay the frame completely flat.
Supplies to Have on Hand
Before purchasing anything, measure your frames. Standard mesh rolls come in widths of 24, 36, and 48 inches. Buying a roll slightly larger than your largest screen avoids waste and gives you material for future repairs.
- Replacement screen mesh: Choose the mesh type that matches your household’s needs based on the material guide above.
- Replacement spline: Available in diameters from 0.125 to 0.250 inches. Bring a piece of your old spline to the store to match the diameter, or measure the groove width with a calliper. The wrong diameter is the most common cause of mesh not staying seated.
- Corner connectors (optional): If existing corners are cracked or loose, replace them at the same time. They cost very little and are sold in packs.
- Frame stock (optional): If the frame itself is bent or corroded beyond repair, aluminum frame stock is sold by the foot and can be cut to length with a hacksaw or mitre saw.
Step-by-Step DIY Screen Replacement Process
Window screen replacement is a straightforward process once you understand the spline-and-groove system. The steps below apply to the vast majority of standard residential screens with aluminum or vinyl frames.
Before starting, work on a clean, flat surface and ensure the frame is free of debris. A dirty groove will prevent the spline from seating properly and cause the mesh to loosen over time.
Step 1: Remove the Old Screen
Lay the frame flat on your work surface. Locate the spline groove running around the inner perimeter of the frame. Use a flathead screwdriver or awl to pry up one corner of the spline, then pull it out of the groove by hand. Work slowly to avoid bending the frame.
Once the spline is removed, the old mesh will lift out easily. Discard both the old mesh and the old spline. Reusing the old spline is not recommended because it loses flexibility over time and will not seat properly in the groove.
Step 2: Inspect and Clean the Frame
With the old mesh removed, inspect the frame for bends, cracks, and corrosion. Minor bends can sometimes be straightened by pressing the frame against a flat surface. Significant bends or cracks in the frame channel will prevent the new spline from seating evenly and should be addressed before proceeding.
Clean the spline groove with a dry cloth or soft brush to remove dust, old adhesive, and debris. A clean groove is essential for a tight, lasting installation.
Step 3: Cut the New Mesh
Roll out your replacement mesh on the work surface and lay the frame on top of it. Cut the mesh approximately 1 inch larger than the frame on all four sides. This overhang gives you material to work with during installation and will be trimmed flush after the spline is seated.
Use a straightedge and a marker to ensure clean, straight cuts. Ragged edges make installation harder and can cause the mesh to pull unevenly when the spline is pressed in.
Step 4: Install the Mesh and Spline
Center the cut mesh over the frame so the overhang is even on all sides. Starting at one corner, use the convex wheel of the spline roller to press the spline and mesh together into the groove. Work along one full side before moving to the adjacent side.
When you reach the second side, pull the mesh gently taut before pressing the spline in. Do not stretch the mesh aggressively; moderate tension is enough. Over-stretching causes the mesh to bow inward or pull out of the groove on the opposite side.
Continue around all four sides, maintaining consistent tension. At corners, fold the mesh neatly rather than cutting it, then press the spline over the fold.
Step 5: Trim Excess Mesh
Once all four sides are splined, use a utility knife to trim the excess mesh flush with the outer edge of the spline. Hold the blade at a slight inward angle so the cut runs just outside the spline, leaving no loose mesh visible from the front.
Run your finger along the spline after trimming to confirm it is fully seated. Any sections that feel loose or raised should be re-rolled before the screen is reinstalled.
Step 6: Reinstall the Screen
Reinstall the finished screen in the window frame. Most residential screens clip or slide into a channel on the window sash. Press firmly at all four corners to confirm the screen is seated evenly. Test the fit by pressing lightly on the mesh from the inside; it should feel taut and spring back without sagging.
Common Window Screen Problems and Solutions
Most screen problems fall into a small number of categories, and many can be resolved without full replacement. Knowing which problems warrant repair versus full replacement saves both time and money.
A useful rule of thumb: if the frame is straight, the corners are intact, and the damage is limited to the mesh, re-screening is almost always the right call. If the frame is bent, the corners are broken, or the screen no longer fits the window properly, replacement of the full assembly makes more sense.
Torn or Punctured Mesh
Small tears of less than half an inch can be temporarily repaired with screen repair patches, adhesive-backed mesh squares available at hardware stores. These patches are not a permanent fix but can extend the life of a screen through the remainder of a season.
Tears larger than a few inches, or multiple small tears across the same screen, indicate the mesh has reached the end of its useful life. Re-screening the frame is the appropriate solution.
Bent or Warped Frames
Minor frame bends can sometimes be corrected by pressing the frame against a flat surface or by gently straightening the channel with a rubber mallet. The goal is to restore enough flatness that the screen seats properly in the window and the spline groove runs true.
Frames with significant bends, kinks, or cracks in the channel cannot be reliably repaired and should be replaced. Aluminum frame stock is inexpensive and can be cut to match the original dimensions.
Loose or Sagging Mesh
Sagging mesh is almost always caused by old or improperly sized spline. The spline loses flexibility over time and no longer holds the mesh under tension. Re-screening with fresh spline of the correct diameter will resolve this in most cases.
If the mesh sags immediately after re-screening, the spline diameter is likely too small for the groove. Carefully match the spline diameter to the groove width before purchasing.
Screens That No Longer Fit the Window
Screens that no longer fit properly are often the result of frame distortion from age, impact, or thermal expansion. If the window itself has been replaced or adjusted, the original screen dimensions may no longer match.
In these cases, building a new frame to the correct dimensions is straightforward using aluminum frame stock and corner connectors. Measure the window opening carefully and build the frame to fit snugly without forcing.
When to Replace vs. Repair Window Screens
The decision between repair and replacement comes down to three factors: the condition of the frame, the extent of mesh damage, and the age of the screen assembly. Understanding these factors helps you avoid spending money on repairs that will not last.
For a task as accessible as screen replacement, the DIY route is almost always the better financial choice when the project is within a homeowner’s skill level. The typical DIY project cost $2,600 in 2023, while the average professionally installed project cost $7,800, and screen re-screening comes in well below even that DIY average.
Repair Makes Sense When
- The frame is straight, and the corners are intact.
- Damage is limited to a single tear or small puncture.
- The screen is less than five years old, and the mesh is otherwise in good condition.
- The screen fits the window properly, and the spline groove is undamaged.
Full Replacement Makes Sense When
- The frame is bent, cracked, or corroded.
- Multiple screens in the same area are failing simultaneously, suggesting age-related deterioration.
- The mesh is brittle, discoloured, or pulling away from the spline in multiple locations.
- The screen no longer fits the window due to frame distortion or window replacement.
When the Window Itself Is the Problem
Sometimes a screen that keeps failing is a symptom of a larger issue with the window assembly. If the window frame has warped, the sash no longer operates smoothly, or you are seeing condensation between panes, the screen is the least of your concerns. At that point, addressing the window itself resolves the root cause rather than patching around it.
For homeowners who are unsure whether their windows have reached the end of their useful life, Weather Pro Windows and Doors offers free in-home consultations with no purchase obligation. The energy savings from window replacement often justify the investment, particularly in Canadian climates where heating and cooling costs are high. Get your free estimate today and find out whether your windows are still performing as they should.
Choosing the Right Screen Frame and Mesh
Selecting the right combination of frame and mesh for your specific situation requires balancing durability, visibility, airflow, and budget. There is no single best option; the right choice depends on your window type, household needs, and local climate.
The table below summarizes the most common mesh types and their key characteristics to help you compare options before purchasing.
| Mesh Type | Material | Durability | Airflow | Best For | Relative Cost |
|---|---|---|---|---|---|
| Standard fiberglass | Fiberglass | Moderate | High | General residential use | Low |
| Aluminum | Aluminum | High | High | High-contact or exposed windows | Low to moderate |
| Pet-resistant polyester | Heavy polyester | Very high | Moderate | Households with pets | Moderate to high |
| Solar/sun-control | Coated polyester or fibreglass | High | Low to moderate | South/west-facing windows | Moderate to high |
| Retractable screen | Varies | Moderate | High | Doors and large openings | High |
Matching Mesh to Window Type
Casement and awning windows that open outward benefit from standard fibreglass or aluminum mesh because they are not subject to the same physical pressure as screens on sliding or double-hung windows. For casement windows, a standard fibreglass mesh in a well-fitted aluminum frame is usually the right call.
Sliding windows and patio-adjacent screens see more contact and benefit from heavier mesh. Pet-resistant polyester or aluminum mesh holds up better in these locations. For double- and single-hung windows, where the screen slides in a track alongside the sash, a slightly stiffer mesh helps the screen maintain its shape during repeated removal and reinstallation.
Matching Frame to Window Opening
Standard aluminum frames are available in pre-cut sizes at most hardware stores and suit most residential windows. For non-standard openings, custom frames built from aluminum stock are the most cost-effective solution.
If your windows use a specific frame profile, such as a snap-in or tension-mount system, confirm the replacement frame type before purchasing. Some window manufacturers use proprietary screen mounting systems that require matching components. When in doubt, bring the original frame to the hardware store rather than relying on measurements alone.
Seasonal Screen Maintenance and Care
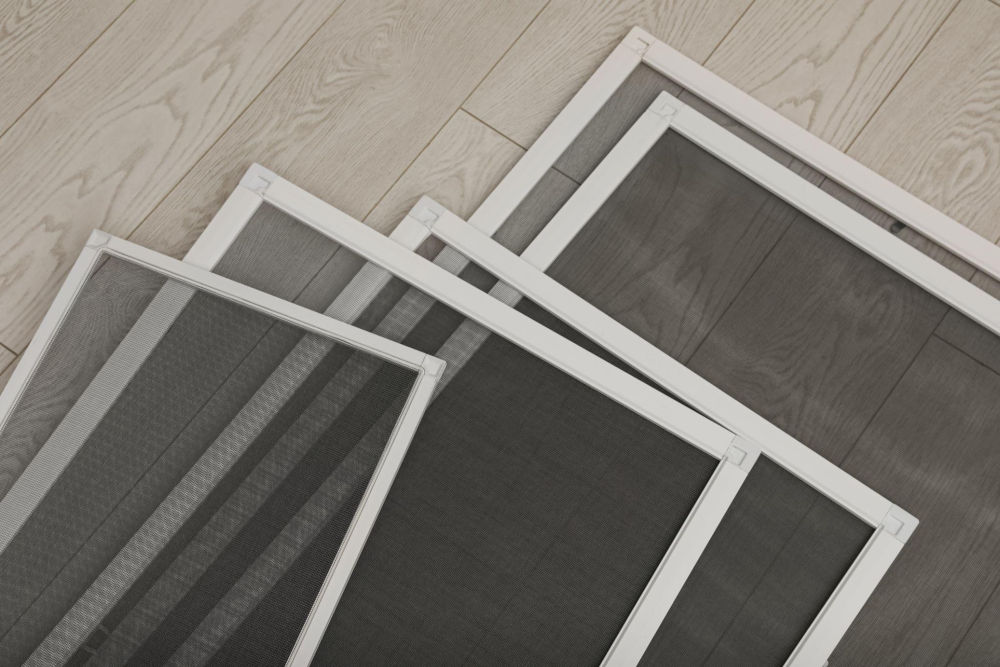
Screens last longer and perform better when they receive basic care at the start and end of each season. A twice-yearly inspection takes less than an hour for a typical home and catches small problems before they become larger ones.
Home maintenance projects were completed by 72% of homeowners in Q2 2026, making maintenance the most common project category even as overall activity softened. Screen care is a straightforward part of that routine, and the homeowners who build it into their seasonal schedule consistently spend less on reactive repairs.
Spring Preparation
Before the warm season, remove screens from storage and inspect each one for tears, bent frames, and loose spline. Clean the mesh with a soft brush and mild soap solution, then rinse with low-pressure water. Allow screens to dry completely before reinstalling to prevent moisture from being trapped against the window frame.
Check that each screen fits its window snugly. A screen that has shifted or warped over winter storage may need minor frame adjustment before it seals properly against the window.
Fall Storage
Removing screens before winter protects them from ice, snow load, and freeze-thaw damage. Label each screen with its window location before storage to simplify spring reinstallation.
Store screens flat or vertically in a dry location. Stacking screens horizontally without support can cause the frames to bend over time. A simple storage rack made from scrap lumber keeps frames straight and organized through the off-season.
Cleaning Without Damage
Avoid pressure washers on window screens. High-pressure water can stretch fibreglass mesh, push debris deeper into the weave, and loosen spline from the groove. A soft brush, mild dish soap, and a garden hose on a gentle setting are all you need.
For aluminum mesh, avoid abrasive cleaners that can scratch the surface and accelerate corrosion. A soft cloth and soapy water are sufficient for routine cleaning. For screens with solar or specialty coatings, check the manufacturer’s care instructions before applying any cleaning product.
“Window screens are a small component, but they are part of the overall envelope performance of the home. When screens are damaged or poorly fitted, you lose the ability to ventilate naturally, which puts more load on your HVAC system and reduces indoor air quality. Keeping screens in good condition is a low-cost way to protect a much larger investment.” Chris Perry, Project Manager at Weather Pro Windows and Doors
Professional Screen Replacement Services and Costs
Most homeowners can replace window screens themselves, but there are situations where hiring a professional makes practical sense. Understanding what professional services cost and when they are warranted helps you make an informed decision rather than defaulting to one approach or the other.
Cost anxiety is a real barrier for many homeowners. Survey data show that 59% of homeowners have delayed necessary repairs due to cost, and 33% cannot afford an emergency repair costing more than $1,000. For screen replacement specifically, the DIY option is accessible enough that cost should rarely be the reason to delay.
What Professional Screen Replacement Costs in Canada
Professional screen replacement costs vary by region, screen size, and mesh type. In Canada, expect to pay between $50 and $150 per screen for professional re-screening of an existing frame, including labour and standard mesh. Custom frames, specialty mesh, or difficult-to-access windows will increase costs.
For full-service window companies that include screen replacement as part of a broader window service, the cost is typically bundled into the overall project price. Asking about screen replacement at the same time as a scheduled window service often results in better pricing than scheduling a separate visit.
When to Hire a Professional
Consider professional service in the following situations:
- You have a large number of screens to replace and lack the time to complete the project yourself.
- Windows are located on upper floors or in difficult-to-access locations that require ladders or scaffolding.
- Your windows use proprietary frame systems that require manufacturer-specific components.
- Screens are part of a larger window or door replacement project that already involves professional installation.
- You have attempted re-screening, and the mesh will not stay seated, suggesting a frame or groove issue that needs professional diagnosis.
Tools and Service Categories
The table below outlines the main categories of screen replacement services and tools available to Canadian homeowners.
| Category | Examples | Best Use Case | Typical Cost Range |
|---|---|---|---|
| DIY materials (mesh and spline) | Hardware stores, home improvement retailers | Single or multiple screens, standard frames | $20 to $60 per project |
| DIY frame kits | Hardware stores | Non-standard openings, full frame rebuild | $15 to $40 per frame |
| Local screen repair services | Independent window and screen shops | Multiple screens, time-constrained homeowners | $50 to $150 per screen |
| Window company screen service | Full-service window and door companies | Screens bundled with window service or replacement | Bundled pricing |
| Specialty screen systems | Retractable screen suppliers | Large openings, doors, high-use areas | $200 to $600 per unit |
Best Practices for Long-Lasting Window Screens
Following a consistent approach to screen selection, installation, and care makes a measurable difference in how long screens last and how well they perform. These practices apply whether you are replacing one screen or refreshing an entire home.
- Match spline diameter to the groove before purchasing. The most common installation failure is using a spline that is too narrow for the groove. Bring a sample of the old spline, or measure the groove width with a calliper, before buying.
- Replace spline every time you re-screen. Old spline loses flexibility and will not hold the mesh under consistent tension. The cost of a new spline is negligible compared to the cost of redoing the job.
- Work on a flat surface. Installing mesh on an uneven surface introduces tension inconsistencies that cause the finished screen to sag or pull at the corners.
- Inspect frames before purchasing mesh. A damaged frame will undermine even a perfect mesh installation. Address frame issues first.
- Label screens before removing them for storage. Screens reinstalled in the wrong window opening will fit poorly and may not seal properly against the frame.
- Clean screens before storage, not just before reinstallation. Dirt and debris left on the mesh over winter can trap moisture and accelerate corrosion in aluminum frames.
- Use the right mesh for the location. Standard fibreglass works for most applications, but high-contact locations, pet households, and sun-exposed windows each benefit from a more appropriate material. Choosing the first time correctly avoids repeat replacements.
- Check the impact of Canadian climate on window components when selecting materials. Coastal humidity, prairie cold, and urban heat islands each create different demands on screen materials and frames.
Common Mistakes and How to Avoid Them
Most DIY screen replacement problems trace back to a small number of avoidable errors. Knowing what to watch for before you start is more effective than troubleshooting after the fact.
- Using the wrong spline diameter. A spline that is too narrow will not hold the mesh under tension; a spline that is too wide will not seat in the groove. Consequence: mesh sags or pops out within days. Fix: measure the groove before purchasing.
- Over-stretching the mesh during installation. Pulling the mesh too tight causes it to bow inward or pull out of the groove on the opposite side. Consequence: uneven tension and a screen that fails prematurely. Fix: use moderate, consistent tension and work one side at a time.
- Reusing old spline. An old spline has lost its flexibility and will not compress properly into the groove. Consequence: mesh that appears installed correctly but loosens within a season. Fix: always use a new spline.
- Skipping frame inspection before re-screening. Installing new mesh in a bent or corroded frame wastes materials and time. Consequence: the finished screen fits poorly, and the mesh may not stay seated. Fix: inspect and repair or replace the frame before starting.
- Cutting mesh too small. Mesh cut to the exact frame size leaves no overhang for installation. Consequence: the mesh pulls out of the groove at corners before the spline is fully seated. Fix: cut mesh at least 1 inch larger than the frame on all sides.
- Storing screens horizontally without support. Stacking frames flat without a support structure causes the bottom frames to bend under the weight of those above. Consequence: frames that no longer fit their windows after storage. Fix: store screens vertically or in a rack that supports each frame individually.
- Ignoring small tears until they become large ones. A half-inch tear that could be patched for a few dollars will expand with use and require full re-screening. Consequence: higher materials cost and more time spent. Fix: inspect screens at the start of each season and address small damage immediately.
- Assuming all screens from the same house are the same size. Window openings vary slightly even within the same home, particularly in older construction. Consequence: screens that do not fit properly after replacement. Fix: measure each frame individually before cutting mesh or purchasing replacement frames.
When Screen Replacement Is Enough and When to Replace the Window
Window screen replacement is one of the most accessible home maintenance tasks available to budget-conscious homeowners. The materials are inexpensive, the tools are basic, and the process is straightforward once you understand the spline-and-groove system that underpins virtually every residential screen. A well-maintained screen keeps insects out, supports natural ventilation, and protects your window frames from debris and moisture damage.
The key decisions come down to material selection, frame condition, and timing. Choose the right mesh for your household’s needs, inspect the frame before investing in new mesh, and build screen inspection into your seasonal maintenance routine. Most problems that lead to expensive repairs start as small issues that a 20-minute inspection would have caught.
When screens are failing repeatedly, or when the window itself is the source of the problem, screen replacement alone is not enough. Drafty frames, failed seals, and windows that no longer operate smoothly are signs that the window assembly has reached the end of its useful life. At that point, the better investment is a full window replacement that addresses energy performance, comfort, and long-term value.
Weather Pro Windows and Doors manufactures windows and doors built for Canadian climates, backed by a transferable lifetime warranty and factory-direct pricing. Over 30,000 Canadian homeowners have trusted Weather Pro for their window and door replacements. Getting started is fast, easy, and free.
Frequently Asked Questions
How long do window screens typically last?
Standard fibreglass screens last between 10 and 15 years under normal conditions. Aluminum screens can last longer, often 20 years or more, but are more susceptible to permanent creasing from impact. Pet-resistant polyester screens vary by brand and usage but generally outperform standard fibreglass in high-contact applications. Proper seasonal storage and cleaning extend the life of any screen material.
Can I replace window screen mesh without replacing the frame?
Yes, in most cases. If the frame is straight, the corners are intact, and the spline groove is undamaged, re-screening the existing frame is straightforward and significantly less expensive than replacing the full assembly. The frame only needs replacement when it is bent, cracked, corroded, or no longer fits the window opening.
What size spline do I need for my window screens?
Spline diameter must match the width of the groove in your frame. Common residential sizes range from 0.125 inches to 0.250 inches. The most reliable way to determine the correct size is to remove a section of your existing spline and bring it to the hardware store, or measure the groove width with a calliper. Using the wrong diameter is the most common cause of mesh not staying seated.
Is it worth replacing window screens on older windows?
It depends on the condition of the windows themselves. If the windows are otherwise functional and energy-efficient, replacing the screens extends their useful life at minimal cost. If the windows are drafty, difficult to operate, or show signs of seal failure, such as condensation between the panes, the screens are a secondary concern. In that case, understanding the signs that it is time to replace your windows is a more useful starting point than investing in new screen mesh.
What is the difference between solar screens and standard screens?
Standard screens use a relatively open weave designed to maximize airflow and visibility while blocking insects. Solar screens use a tighter, coated weave that blocks a portion of solar radiation before it enters the window, reducing glare and cooling loads in summer. Solar screens also provide daytime privacy from outside. The trade-off is reduced airflow and a darker interior view, which makes them best suited to south- and west-facing windows rather than for general use.
Can window screens reduce noise?
Standard insect screens provide negligible noise reduction because the mesh is too open to block sound transmission. Triple-pane windows with specialized glazing are the effective solution for noise reduction. Weather Pro’s triple-pane windows significantly reduce outside noise, a meaningful improvement for homes near busy roads or in urban environments. For more on this topic, the benefits of triple-pane windows are covered in detail.